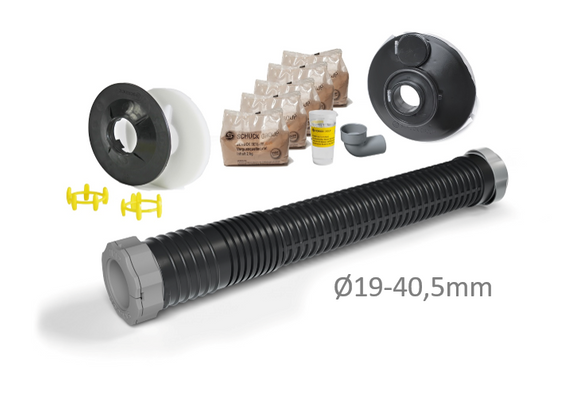
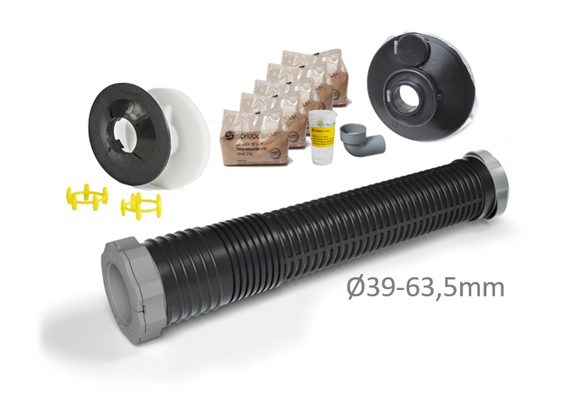
SCHUCK builder's package MHP for sealing pipes (water / electricity) from Ø19mm to Ø63.5mm in the wall
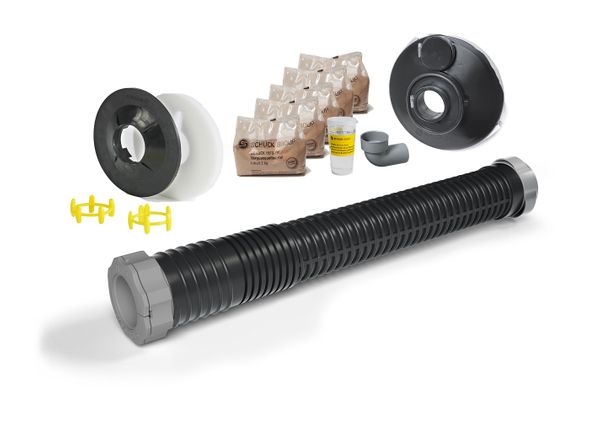
SCHUCK Builder's Package "House Transition MHP"
BUILDERS TAKE NOTE - BUY HOUSE TRANSITIONS ONLINE NOW.
The Schuck builder's package provides everything you need for the professional installation of a house supply transition in the basement wall in accordance with the standards. The builder's package for installation in the wall includes all the necessary accessories and materials for the installation of a house transition for supply lines.
Standard-compliant solutions for house transitons with the Schuck builder’s package:
1. Wall Installation Ø19-40.5mm
Installation of a 1-supply house-transition with a diameter of 19-40.5mm in the basement wall.
2. Wall Installation Ø39-63,5mm
Installation of a 1-supply house-transition with a diameter of 39-63.5mm in the basement wall.
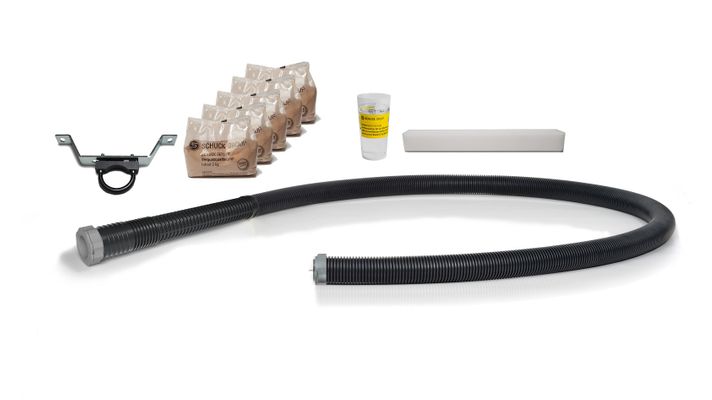
3. Installation in the Slab
The builder's package is also available as a variant for installation in the floor slab with flexible pipe (RG66/60).
Assembly Instructions for SCHUCK Builder's package for wall installation
This includes both sizes Ø19-40.5mm and Ø39-63.5mm.
REQUIREMENTS
The wall opening should be made by a core drilling and must be at right angles to the wall (max. 5° deviation). Core drill diameter: MHP RG66/60: Ø 80-100mm or MHP RG95/90: Ø 120-130mm. Select position so that there is sufficient free space on the flat wall surfaces. Avoid uncontrolled drainage of Schuck Beto-Fix Plus in masonry with gaps (fill cavities). Moisten the core drill hole. If a building seal is present, e.g. according to DIN18533, the surface in the area around the house transition (contact surface sealing flange) must be even, without overlaps and edges, free of defects and free of dirt.
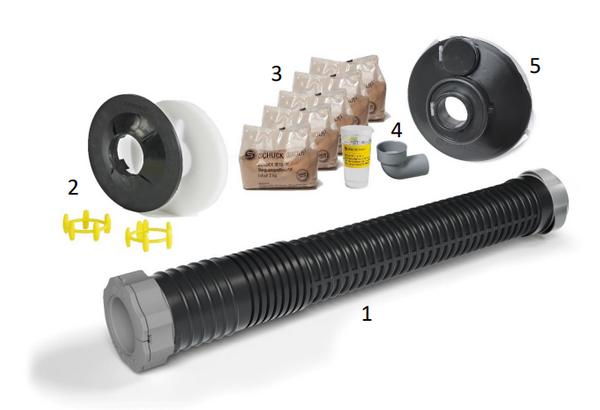
Scope of Delivery "Wall Installation"
Available sizes Ø19-40.5mm and Ø39-63.5mm
Scope of delivery of builder’s package for wall installation
- House-transition MHP (RG66/60 or RG95/90).
- Wall termination set consisting of ARO plate, sealing washer and two centering rings.
- Five bags of 2 kg grout Schuck Beto-Fix Plus with measuring cup.
- Filling funnel.
- Sealing flange 18533.
INSTALLATION STEP BY STEP
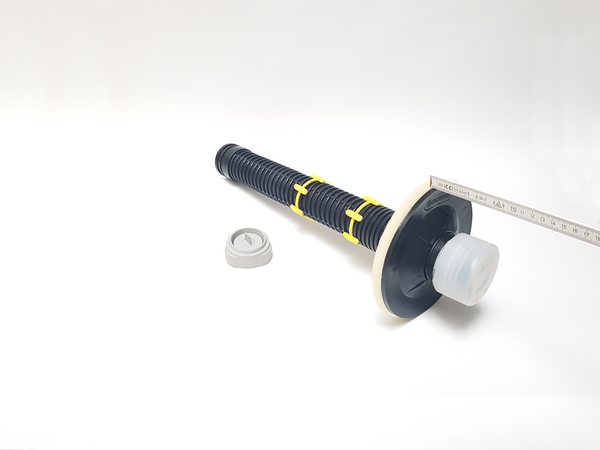
Screw on the sealing washer until the desired wall distance is reached.
1. PREPARE THE HOUSE TRANSITION
Slide the ARO plate and sealing washer over the dirt-free house transition MHP and screw it on until the desired wall distance is reached. To do this, briefly remove the end collar. Then place the spacer rings on the MHP house transition and position them so that they are inside the wall.
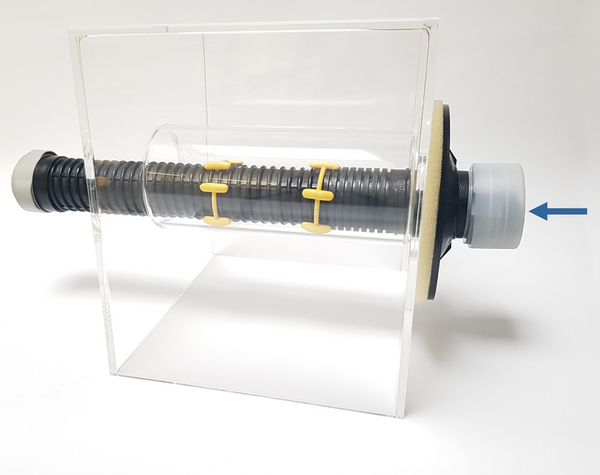
Insert the house transition from the basement.
2. INSERTING THE HOUSE ENTRY
Then push the house transition MHP through the opening from the basement.
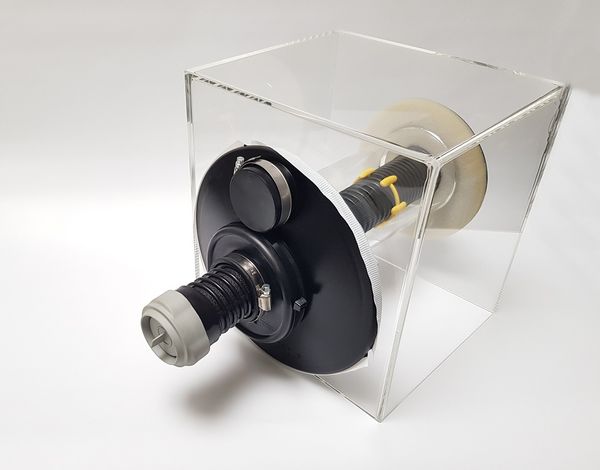
Place the sealing flange 18533 on the house transition..
3. INSTALLATION OF SEALING FLANGE 18533
Apply lubricant to the inside of the sealing flange 18533 (5) and slide it over the house entry MHP, aligning the filling opening upwards.
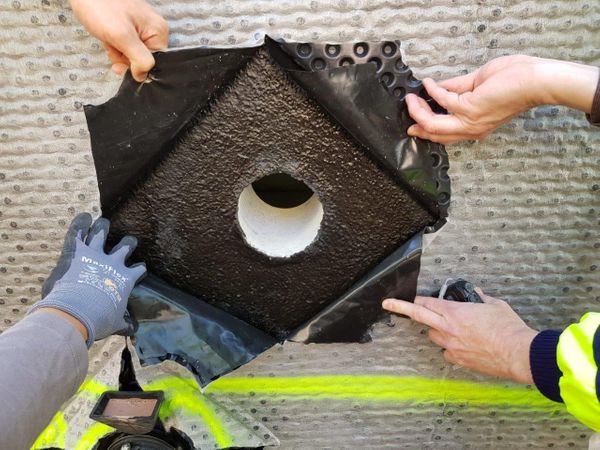
Consider the standard-compliant installation according to DIN18533.
Info: If a building seal according to DIN18533 exists, the 18533 sealing flange must lie on the existing seal. For this purpose, it may be necessary to remove the dimpled sheet, sliding foil and insulation in the area around the core drill hole in to expose the building seal!
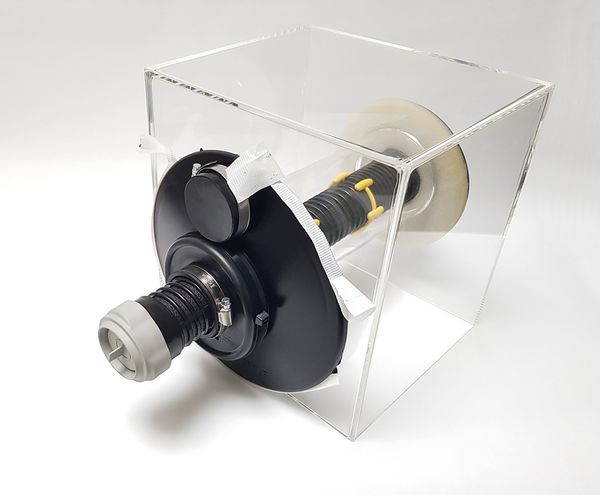
Sealing flange 18533 with protective film.
4. INSTALLATION OF SEALING FLANGE 18533
Remove the protective film from the butyl sealing tape completely.
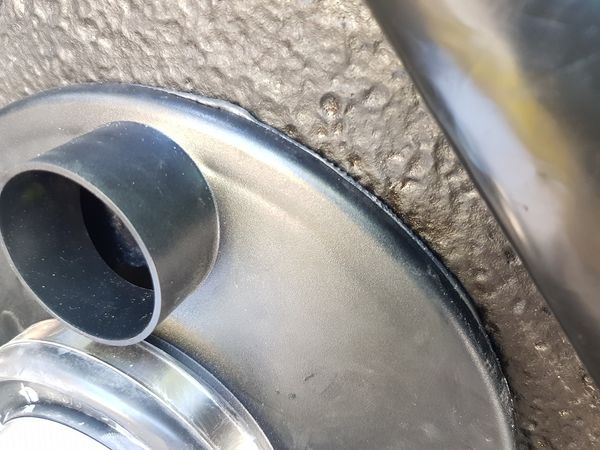
Align the filling opening upwards and press the plastic butyl sealing tape firmly against the wall all around.
5. INSTALLATION OF SEALING FLANGE 18533
Align the sealing flange 18533 with the filling opening facing upwards and press it firmly against the wall by hand for several seconds until the plastic butyl sealing tape is in contact with the wall all around.
Info: In case of particularly uneven walls where the sealing flange 18533 does not fit circumferentially, the imperfections must be sealed temporarily, e.g. with woolen cloths, to prevent uncontrolled drainage of Schuck-BetoFix Plus.
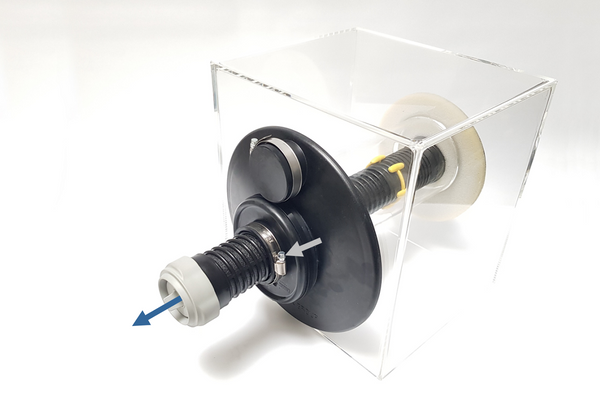
Pull the house transition MHP outwards and secure it with the correct torque.
6. INSTALLATION OF SEALING FLANGE 18533
Pull the house transition MHP outwards to press the sealing washer behind the ARO plate against the wall, tightening the clamping band on the house transition MHP to the specified torque:
- SW7 (RG66/60 and RG80/75): 4Nm
- SW13 (RG95/90): 10Nm
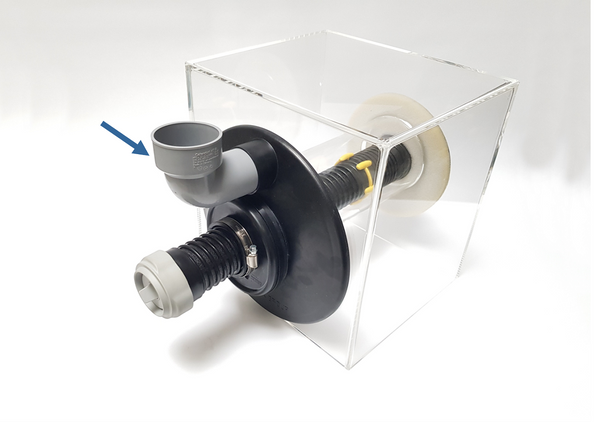
Place the filling funnel on the sealing flange.
7. INSTALLATION OF SEALING FLANGE 18533
Remove the cap of the filling opening and put on the filling funnel (4).

When mixing Beto-Fix, it is necessary to adhere to the quantity instructions.
8. GROUTING
Info: 5 bags of Schuck Beto-Fix Plus make approx. 5 litres of ready mix.
Pour 5 measuring cups of 300 ml water into the bucket (total 1.5 litres, keep to the exact amount of water!) Add 5 bags of Schuck Beto-Fix Plus (3).
(If more material is needed due to particularly thick walls or large wall openings, use more material, available at www.schuck-leerrohrsystem.de).
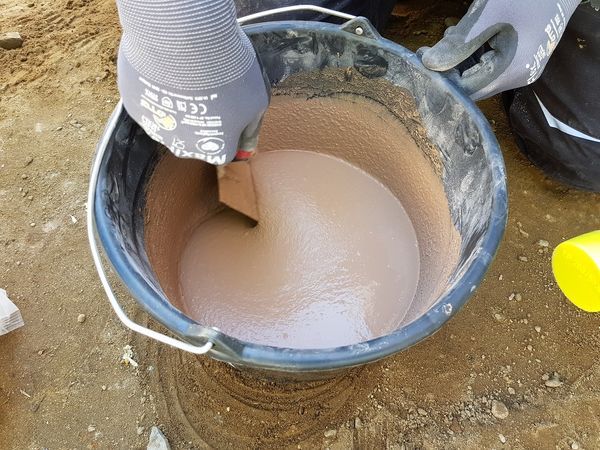
It is also important to observe the time intervals when mixing.
9. GROUTING
Mix well by hand with a trowel or with a slowly rotating mixer for a maximum of one minute, avoiding the formation of lumps. Allow Schuck Beto-Fix Plus to rest for approx. 30 seconds after mixing. Do not stir again afterwards.
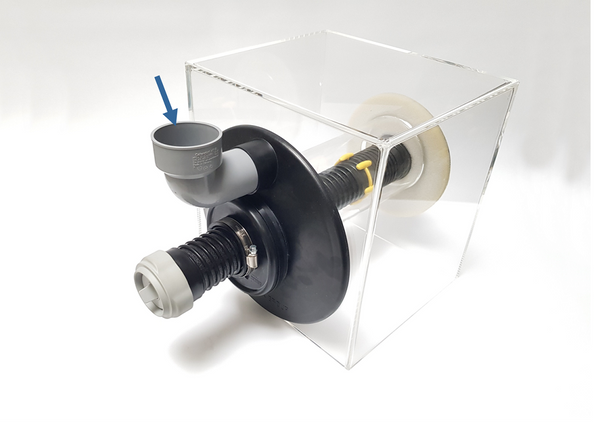
Pour Beto-Fix Plus quickly.
10. GROUTING
Pour Schuck Beto-Fix Plus quickly through the funnel (4) until the funnel is completely filled.
Info: Control option for successful, standard-compliant grouting: If the level in the full filling funnel does not drop any further, the core drill hole is completely filled.
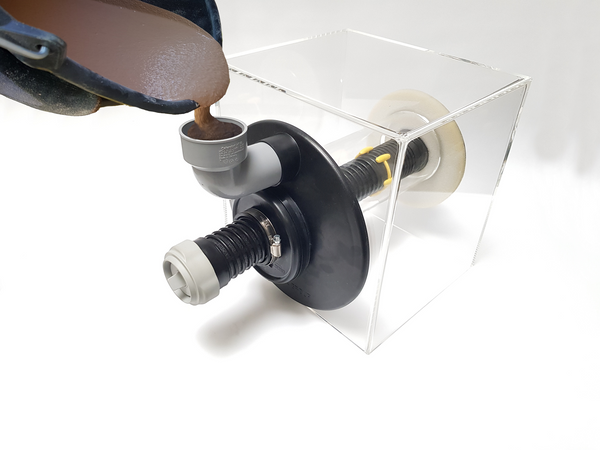
MHP - Installation with Beto-Fix.
11. GROUTING
Depending on temperature and weather, Schuck Beto-Fix Plus will begin to harden after 5 to 10 minutes. Remove the funnel and its contents before final curing.
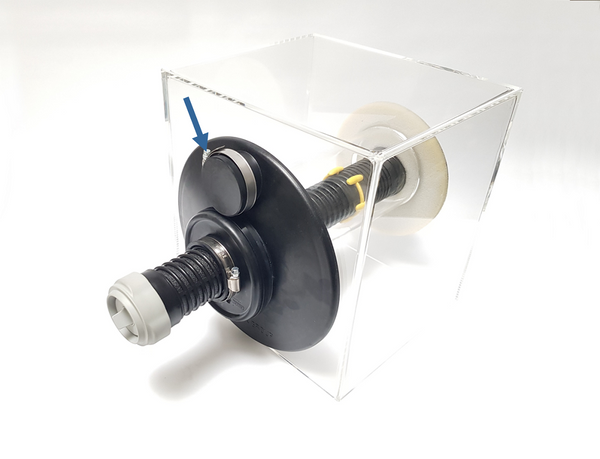
Further information about cable installation behind the protective cap.
12. CLOSING
Place the sealing cap on the filling opening and tighten the clamping band with 1.5 Nm.
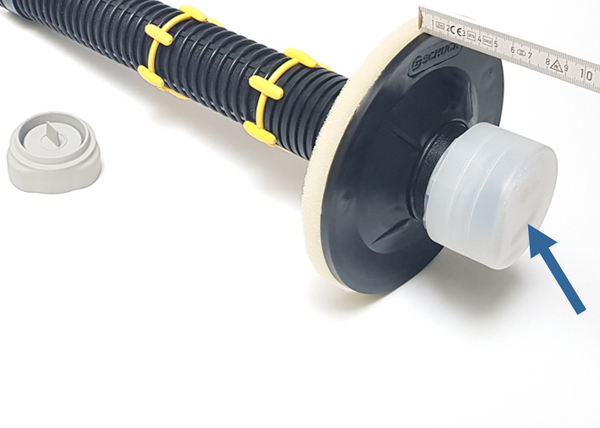
Information on further cable installation behind the protective cap.
13. INSTALLATION OF THE PIPE
Install and seal the cable in accordance with the "Installation Instructions for Schuck Modular House Transition MHP and MHP-FLEX". These can be found under the protective cap of the MHP on the inside of the building. The cable can be installed later and is usually carried out by the energy supplier.
GENERAL
Valid regulations, standards and specifications must be observed, even if they are not explicitly mentioned in these instructions!
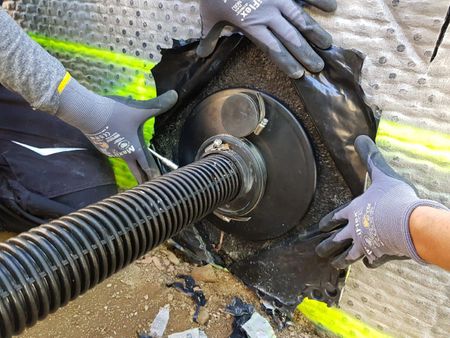
SCHUCK House Transitions- Simple. Secure. Sealed.

Flexible house transition supply for buildings without basement.
Do you require installation in the floor slab? - SCHUCK builder's package MHP-FLEX
VARIANT: Installation in the floor slab
This 1-supply house-transition inlet for buildings without basements can be installed in both new and existing buildings.
SEE INSTALLATION INSTRUCTIONS
DOWNLOAD & BONUS MATERIAL:
Click on the desired document to download the installation instructions.
BUY HOUSE ENTRY ONLINE:
- SCHUCK builder's packages are
- available in the E.DIS Netz GmbH online shop.
RELATED BLOG POSTS..
Sealed even without a ditch Beto-Fix Plus Installing a house entry with Fibre Optic Pipes Universal house entry for buildings without a basement Safe gas house entry with Firesafe "FI" switch lever Large choice - new nominal sizes: SK ball valve for all gas lines Potting of a Schuck sealing flange in the video Sealing Flange 18533 in use Product developments for hydrogen fittings Radon-proof basements and buildings


